All Playbooksby edouardtheginger

AI ASMR: from prompt to post
Create one short video with several shots, add matching sound, edit it and schedule it. This example uses a 10-second clip. No n8n template or extra skill is needed.
The six parts
- Pick your ASMR concept.
- Generate one multi-shot clip.
- Add sound to the whole clip.
- Edit the finished clip.
- Connect your social accounts.
- Prepare captions and schedule.

Part 1: Pick your ASMR concept



Step 1: Pick your concept
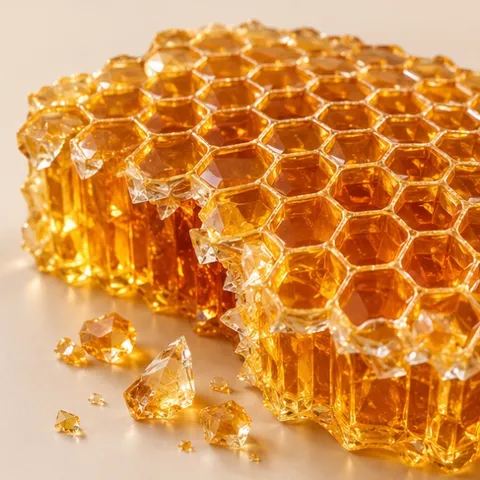
Choose glass strawberries, crystal mango, jewel grapes or glass honeycomb.
Step 2: Open ChatGPT or Claude
Copy the full prompt below into your chat. Replace the placeholders with your concept and audience, then send. Example: glass strawberries; crunchy ASMR fans.
Step 3: Save both outputs
The chat should return one VIDEO PROMPT and one AUDIO PROMPT. Keep both for the next two steps.
 CLICK HERE


Turn [SELECTED CONCEPT] into one 10-second vertical AI ASMR mukbang clip for [TARGET AUDIENCE].

Return two labeled blocks:

VIDEO PROMPT: Write one Seedance 1.0 prompt under 1,500 characters. Define one adult fictional character, imaginary glass-like food, setting and lighting. Describe three brief shots within 10 seconds: reveal the food, show one complete bite, then show the satisfying texture and chewing. Keep the character and food consistent. Use 9:16 close-ups, simple camera movement and clear cuts. Start immediately. No injuries, dialogue, captions or logos.

AUDIO PROMPT: Write one MMAudio prompt for the entire clip. Describe close-miked bites, cracks, crunches and chewing specific to the material. Match the actual visible actions, including across cuts. Quiet background, controlled volume; no speech or music.

Keep the shots achievable in 10 seconds. Do not output separate generation prompts for each shot.

Part 2: Generate one multi-shot clip
Use one video prompt for the whole clip. Several shots share the selected duration; three shots do not mean three separate 10-second videos.
Generate the video
Seedance 1.0 · Lite / Pro / Pro Fast




Step 1: Choose one provider
Open a link below, sign in and add credits. WaveSpeed Lite 480p is the budget example.
Step 2: Set the generation
Choose text-to-video, 9:16 and 10 seconds. Use 480p for the budget test; choose 720p or 1080p where supported for a sharper result.
Step 3: Paste and download
Paste the VIDEO PROMPT from part 1 once. Generate, watch the entire result and save it as asmr-video.mp4.
Choose the model listed for your provider

- fal.ai
- Seedance 1.0 Pro Fast
- WaveSpeed
- Seedance V1 Lite T2V 480p
- Kie.ai
- V1 Pro Text To Video for multi-shot
- Replicate
- bytedance/seedance-1-lite
fal has retired its Lite endpoint and redirects to Pro Fast. Kie documents multi-shot support for Pro. Follow the linked provider page; variants and prices differ.
Budget example: one 10-second generation

- WaveSpeed Lite video at 480p
- $0.16
- WaveSpeed MMAudio V2 sound
- $0.01
- Video + sound generation only
- about $0.17
Published rate estimate, checked 6 October 2026. Excludes chat, editor and scheduler plans, credit top-ups, retries and higher-resolution output. Check the live generation quote before paying.

Part 3: Add sound to the whole clip
Generate the sound
MMAudio

Step 1: Choose MMAudio
Open one of the four providers below. fal and WaveSpeed offer MMAudio V2; the other listings are MMAudio.
Step 2: Upload your video
Upload asmr-video.mp4. Paste the AUDIO PROMPT from part 1. Match the sound duration to the actual clip, usually 10 seconds here.
Step 3: Listen and save
Check every bite and cut with headphones. Download the video with sound as asmr-sound.mp4, or keep the separate audio beside its video.
Use your generated AUDIO PROMPT first. This reusable version is useful when you need to revise the sound after seeing the actual clip.
Close-miked ASMR of [FOOD OR MATERIAL] being [VISIBLE EATING ACTION].

[SOUND TEXTURES FOR THE CLIP].

Match each bite, crack, crunch, and chewing sound to the corresponding movement in the uploaded video. Follow the actual action timing across all shots, with delicate texture sounds between stronger crunches.

Use a quiet background, clear detail, and controlled volume. No music, speech, narration, unrelated effects, harsh distortion, or exaggerated reverb.
If the sound misses a bite: describe the visible action more precisely and rerun the audio only. If your download contains audio alone, align it to the video start in the editor and keep the tracks linked.

Part 4: Edit the finished clip
Edit your video
AI video editors




Step 1: Import your clip
Open one editor below and upload asmr-sound.mp4. If sound is separate, import both files and align their starts.
Step 2: Open its assistant
Use ChatCut chat, Descript Underlord, Kapwing’s video assistant or VEED’s assistant. Paste the prompt below and identify the uploaded clip.
Step 3: Review and export
Check the cuts and audio sync. Make any unsupported adjustment in the editor, then export the final MP4.
Edit [VIDEO CLIP] into a polished vertical 9:16 ASMR video.

Keep the clip’s audio linked and synchronized when trimming. Remove black frames, frozen endings and unnecessary waiting before or after the action. Preserve complete bites, satisfying crunches and quiet texture sounds.

Use clean cuts and consistent volume. Prevent clipping and abrupt audio clicks. Do not add music, voiceover, captions, transitions or generated footage. Keep the original playback speed.

Keep the natural duration without padding. Preserve the source resolution and export an MP4.

Flag any remaining visual artifacts or synchronization problems for review.
Final playback check: watch with headphones. Keep the complete bite, remove dead time and check for distorted faces, broken food geometry, black frames or an abrupt ending. Export at the source resolution; enlarging 480p does not restore detail.

Part 5: Connect your social accounts
Schedule your video
Connect your social accounts



Step 1: Pick one scheduler
Postiz is the example here. Create an account and connect the social profiles you want to use through its dashboard.
Step 2: Connect your AI agent
Add the official Postiz connector in ChatGPT or Claude where available, or follow its MCP setup guide below. Sign in to your Postiz account.
Step 3: Check the connection
Ask: “List my connected social accounts.” Confirm the returned profile names before giving the agent your video.
MCP is a connection that lets your assistant use an app. A prompt alone cannot connect accounts or schedule posts. Use one supported connector; you do not need all four services.
Connection guides
If a connector requires an API key, enter it in the connector’s secure settings. If your agent cannot upload local files, use the scheduler’s upload area and provide the resulting accessible media link.

Part 6: Prepare captions and schedule
From video to socials
- 01 Finished video
- Give your agent the final MP4.
- 02 Prepare captions
- Write a caption for each platform.
- 03 Review + approve
- Check captions, accounts and times.
- 04 Schedule the posts
- Use your connected publishing app.
Confirm each post in the scheduled queue.
Step 1: Give the agent the video
Attach your final MP4 or provide a supported media URL. Replace every placeholder below, including the time zone.
Step 2: Review the plan
Check the exact accounts, captions, date and time. Keep the AI-generated disclosure. Approve only the version you want posted.
Step 3: Confirm the queue
Check the scheduler for one post per destination. A message saying “done” is not enough; verify its status and scheduled time.
Prepare [FINISHED VIDEO FILE OR URL] for publication using [CONNECTED PUBLISHING SERVICE].

Video concept: [CONCEPT].
Destination accounts: [PLATFORMS AND ACCOUNTS].
Schedule: [DATE, TIME, AND TIME ZONE].

Write a short caption for each platform with relevant hashtags. Describe the video as AI-generated ASMR. Avoid earnings promises, invented claims, or presenting the footage as real.

Check each platform’s upload requirements and apply supported AI-content disclosures.

Show me the captions, destination accounts, and posting times for approval. After approval, schedule each post once.

Return each platform’s confirmed scheduled time and post ID or link. Report failed or unsupported actions clearly. Do not claim a post is scheduled without confirmation from the publishing service.
Keep your files: save the video prompt, audio prompt, final MP4 and editing project together. If a post fails, check its status before retrying so you do not create duplicates.